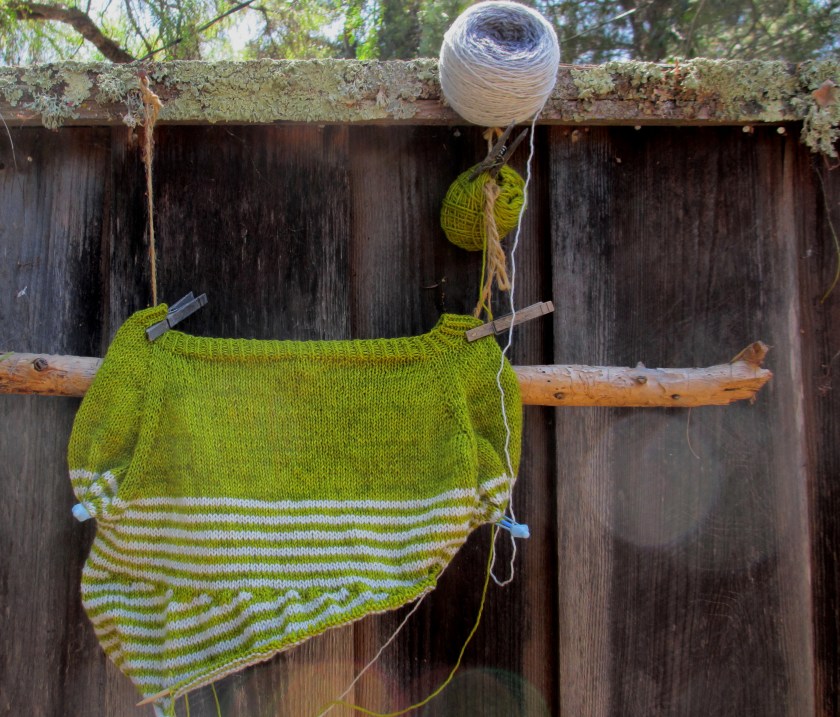
Here’s a current project using this week’s featured stitch. The particular yarn I am using, Plymouth Yarn, Arequipa worsted 90% Superwash Merino and 10% Mulberry Silk highlights the stitch definition beautifully.
Photo credit: Mary Lou Fall
I’m not quite sure where I’m going with this…buttons, vintage trim or maybe even a zipper.
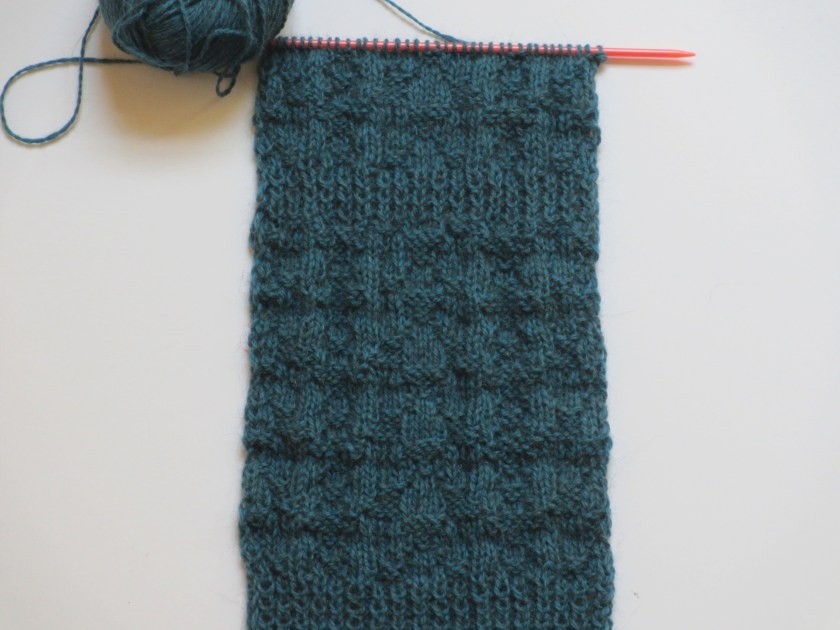
I decided to convert this week’s stitch pattern from flat to circular. I hiked to my local library in search of Margaret Radcliffe’s, Circular Knitting Workshop, which focuses on essential techniques to master knitting in the round.
I’ve always known the gauge swatch for circular knitting should be done circularly, but I avoided doing it. So, I decided to experiment with an open-backed swatch on double-pointed needles while carrying the yarn across the back – the same technique for knitting i-cord.
It just so happens my gauge was slightly looser compared to knitting the same stitch pattern flat.
CO 217 sts (extra stitch included) join in the round.
Cast on one extra stitch. To join, slip one stitch purlwise from the right needle to the left needle. Holding the cast-on tail together with the working yarn, knit 2 together which will join the first and last stitches of the cast on, place marker. When you come to the first stitch at the beginning of the next round, knit the 2 strands together.
Circurlar (converted flat pattern above)
Rnd 1: *K3, P1, K3, P1, *repeat across the row.
Rnd 2: *K1, P3, K1, P3,
Rnd 3: *K1, P2, K2, P2, K1
Rnd 4: *P1, K2, P2, K2, P1
Rnd 5: Repeat Rnd 4
Rnd 6: Repeat Rnd 3
Rnd 7: P8
Rnd 8: Repeat Rnd 7
Rnd 9: P3, K2, P3
Rnd 10: K3, P2, K3
End of pattern. Continue repeating until desired width is reached.
CO 217 sts (extra stitch included) join in the round.
Cast on one extra stitch. To join, slip one stitch purlwise from the right needle to the left needle. Holding the cast-on tail together with the working yarn, knit 2 together which will join the first and last stitches of the cast on, place marker. When you come to the first stitch at the beginning of the next round, knit the 2 strands together.
I found the perfect yarn for the perfect project…Zealana Rimu. Fingering Weight Rimu is a machine washable brushtail possum blend. Using this unique yarn also helps make New Zealand’s ecosystem a lot healthier. The brushtail possum invades the nest of New Zealand’s kiwi, which face habitat destruction by these unwanted non-native species.
Edge Stitches: Chain stitch: (RS) Slip the first and last stitch purl wise with the yarn in front. (WS) Knit through the back loop of the first stitch and knit the last stitch.
Scarf
CO 38 stitches using a Size 5 US needle.
Rows 1-12: Work twisted ribbing (k1 tbl, p1) for approximately 2 inches.
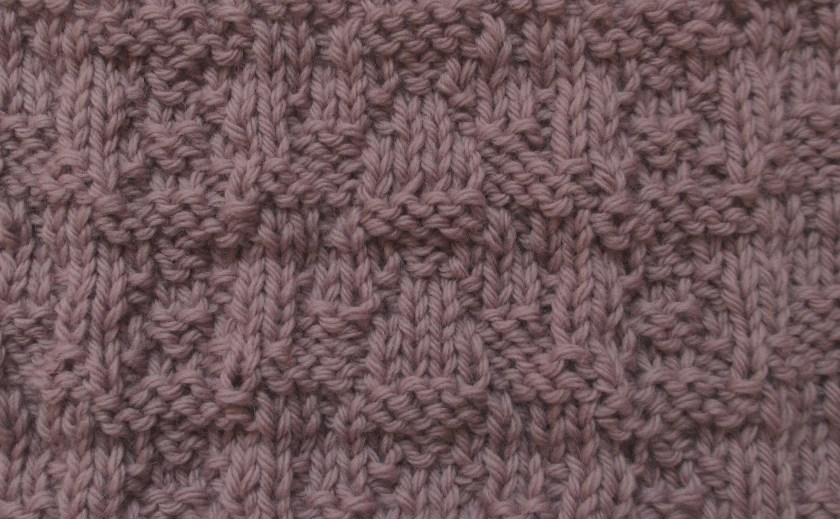
Stitch #2 depicts squares within a square. I wonder what this would look like using slip-stitch knitting? Knit at least three pattern repeats to fully see the pattern.
10 stitch pattern repeat
CO 30 using a smooth worsted-weight yarn and Size 7 US Needles.
Row 1: K2, P1, K4, P1, K2
Row 2 and all even rows: Knit the stitches as they present themselves.
The swatch is knit with a smooth worsted-weight yarn using US Size 7 needles. Knit the stitch pattern at least three times through to fully enjoy the stitch pattern.
18 st pattern repeat
CO 36 sts
Row 1: K2, P3, K3, P2, K3, P3, P2
All even rows: Knit the stitches as they present themselves.
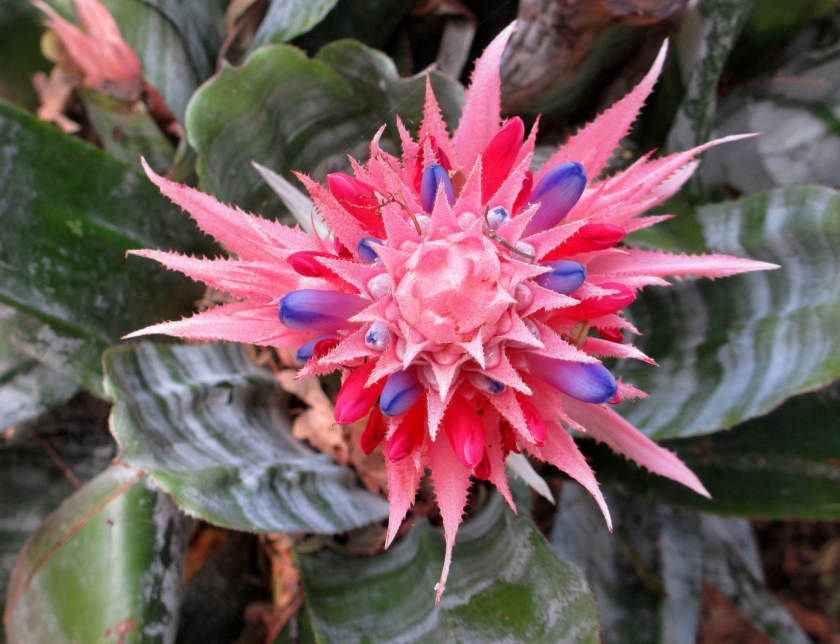
Finally, the heat has subsided and temperatures are back to normal for this time of year. I decided to take my needles and yarn outside for a change of scenery.
Photo credit: Mary Lou Fall
I was greeted by three bromeliad pups. The plant basically gets ignored, but always seems to provide us with such beauty every year. I decided to organize my knitting space within eyesight of nature’s gift.
During a recent visit to Avenue Yarns on Solano Avenue in Albany situated not far from Berkeley, I decided to finally embrace short-rows. Just by coincidence, a pattern I was also checking out on Ravelry was recommended I try, Breathing Space, designed by VeeraValimaki. “The sweater is worked from top-down with a raglan yoke and the asymmetric shaping makes it very stylish and at the same time very easy to wear.”
Photo credit: Mary Lou Fall
After starting and restarting a few times, I finally figured out short-rows with the help of Purl Bee’s online tutorial http://www.purlsoho.com/create/2008/06/18/short-rows/. The main color I selected for Breathing Space from MJ Yarns, Simple Sock Fingering Weight, 75% Superwash Corriedale/25% Nylon, Col. Fresh Mowed, and the yarn for striping Wollelfe M/S Gradient 400 Fading to Grey, 65% Merino extra fine, 35% Silk. I did gauge swatch the yarns and found Simple Sock Fingering did shrink a little. The pattern is written with clear concise directions, and definitely exercises the brain cells.
Just by changing my “breathing space”situating myself in an environment of beauty and calm, in a different space and time, I was able to reflect on one line in the pattern description that resonates with me in a very personal way, “The art of breathing, something we rarely really pay attention to, is so much like letting go.”
Last summer, I explored surface design with polymer clay by experimenting with metallic dye and paint. This summer, I cracked the cover of Betsy Hershberg’s book, Betsy Beads published by XRX Books in 2012. Sometimes, when I get so excited about a new project, I jump in feet first. Even though I know how to knit I-cord, I convinced myself to start from the beginning of the book with the first I-cord tutorial.
Photo credit: Mary Lou Fall
Beginning at the top slipping beads according to the directions: A) Knit five rounds, purl 1 round. B) Knit one round, purl one round. C) Same as B.
Betsy’s first and straightforward project, KISS: Keep It Simple Spiral happened by happenstance. “A Zen moment – recognizing that what you are looking for can often be found only when you stop looking.”
Photo credit: Mary Lou Fall
The shorter green necklace highlights KISS: Keep It Simple Spiral. The blue lariat necklace knit with sock-weight merino and 700 glass seed beads follows the all-over bead-knit tube technique, finished using the Zipper Technique for joining the cast-on to the bind-off edge.
Photo credit: Mary Lou Fall
Here are two more examples of the KISS: Keep It Simple Spiral knit with bamboo and Japanese seed beads.
Photo credit: Mary Lou Fall
The above Dorset button beaded bracelet is knit with tulle and glass seed beads using 5 rounds, purl 1 round I-cord. Also, the button was embellished with beads.
I also experienced my “Zen moment,” Approaching a known technique, which I’ve worked with, as if I were doing it from scratch gave me the opportunity to look at it from a different perspective.
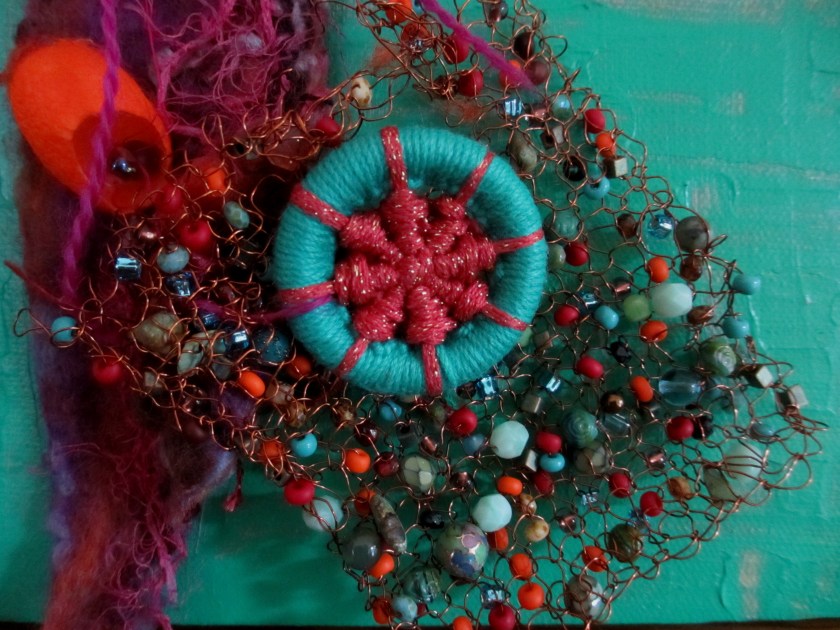
Why shouldn’t stitches be on canvas? Stitches can be sewn, woven, knitted and crocheted using plastic, bamboo, wire, animal and plant fiber to name a few. Stitches hold something together to adorn the body, or hold someone together when nothing else seems to work. Stitches are created using a machine or by hand producing added texture and dimension to our lives. So, why shouldn’t stitches be on canvas?
Photo Credit: Mary Lou Fall
Knitted wire stitches with beads held together by a stitched Dorset Button sewn by hand attached to felted wool embellished with a silk cocoon on silk fabric.
Photo Credit: Mary Lou Fall
Mixed-media stitches on painted canvas.
Photo Credit: Mary Lou Fall
A stitched Dorset Button sewn to a piece of silk stitched to a felted piece of wool, which reminds me of my favorite flower, the sunflower.
The sunflower is mine, in a way – Vincent Van Gogh


You must be logged in to post a comment.