Every once in awhile, I put down my knitting needles and pick-up a block of polymer clay. A dear friend of mine, Debbie Anderson, teaches interesting classes using the medium. Debbie and I, about 21 years ago, were two of the founding members of the South Bay Polymer Clay Guild in San Jose, California.
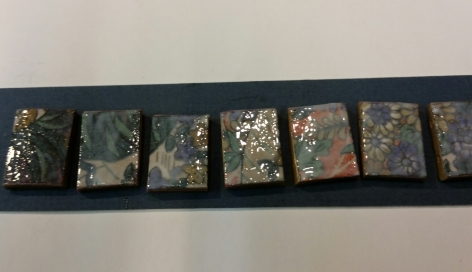
Here are a few photos highlighting the tile bracelet technique:
Both sides of a fabric strip were treated with fabric stiffener, and left to dry for a couple of days.Once a channel for elastic cord was constructed and a backing sheet of polymer clay was applied, the tiles were cut apart and liquid polymer was applied to the fabric surface of the tile.After the tiles were processed in the oven, gloss was added to the surface of each tile.The tiles were strung with seed beads and a hand sculpted toggle using polymer clay.Texture was added to the back of the tiles using an unmounted rubber stamp.Photo credit: Mary Lou Fall
Yesterday, while revisiting familiar territory, I began to reflect on my various artistic experiences with polymer clay and my own artistic growth.
Fantastic! These would make great gifts and I have so many fabric remnants that would be perfect to use. I’d love to know more. Like, how did you construct a channel for the elastic cord? And are there particular brands or specific products you recommend for the materials you mention?


I agree, the back side is very interesting too. I’m going to get a copy of the stamp from my friend.
LikeLike
Thank you! It was such an interesting project, especially the construction of the bracelet.
LikeLiked by 1 person
Yes and yes. When you have time…we could sit down and I could show you how to make them.
LikeLike
Fantastic! These would make great gifts and I have so many fabric remnants that would be perfect to use. I’d love to know more. Like, how did you construct a channel for the elastic cord? And are there particular brands or specific products you recommend for the materials you mention?
LikeLike
These tiles look amazing! I love the bracelet.
LikeLike
I like that the back is as interesting as the front!
LikeLike